


In this blog, we will deep dive into the Terraform Vault. Terraform Vault is a Hashicorp tool that can store and manage different secrets such as tokens, passwords, API tokens, certificates, and so on. By smoothly integrating the terraform with the Hashicorp vault, can ensure the integrity of our sensitive data and mitigate the risk of unauthorized access or data leaks. This integration empowers us to leverage secrets stored in the HashiCorp Vault directly within our Terraform workflows, enhancing security measures and safeguarding critical information.
Firstly, we will initiate the creation of an EC2 instance either manually from AWS ui or using Terraform. Subsequently, within the instance, our focus will shift to the installation of Hashicorp Vault. This installation lays the groundwork for subsequent integration with Terraform, establishing a smooth connection between the two tools. Through this orchestrated process, we aim to set up an environment where HashiCorp Vault becomes an integral part of our Terraform workflows, enhancing security and management of sensitive information.
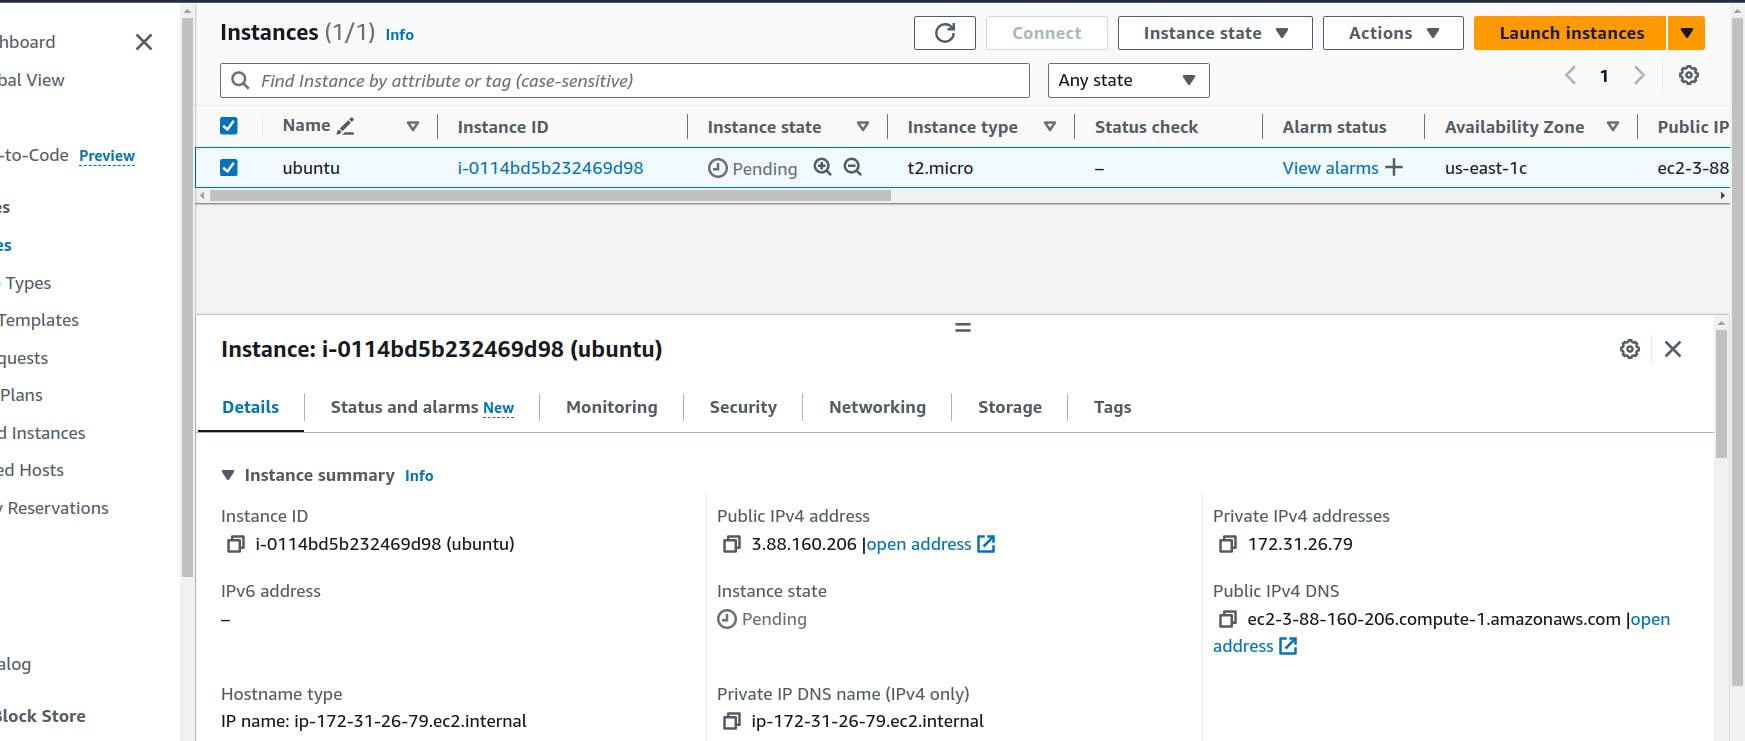
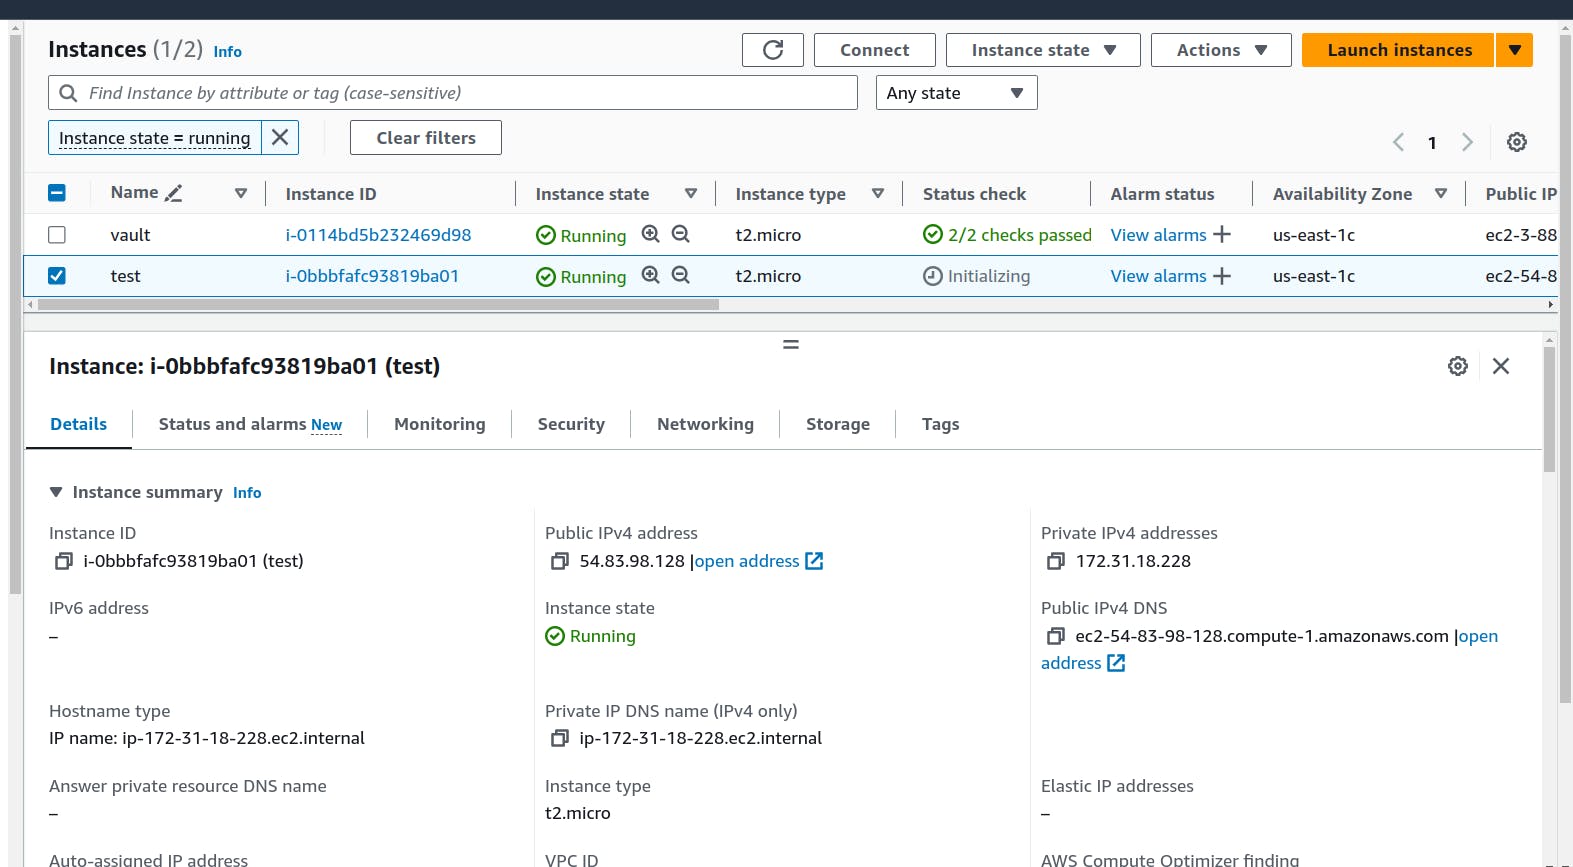
Our instance is created and ready.
In the ec2 instance, we will install the Vault.
Install gpg
sudo apt update && sudo apt install gpg
Download the signing key to a new keyring
wget -O- https://apt.releases.hashicorp.com/gpg | sudo gpg --dearmor -o /usr/share/keyrings/hashicorp-archive-keyring.gpg
Verify the key's fingerprint
gpg --no-default-keyring --keyring /usr/share/keyrings/hashicorp-archive-keyring.gpg --fingerprint
Add the HashiCorp repo
echo "deb [arch=$(dpkg --print-architecture) signed-by=/usr/share/keyrings/hashicorp-archive-keyring.gpg] https://apt.releases.hashicorp.com $(lsb_release -cs) main" | sudo tee /etc/apt/sources.list.d/hashicorp.list
sudo apt update
Finally, Install Vault
sudo apt install vault
To start the Vault
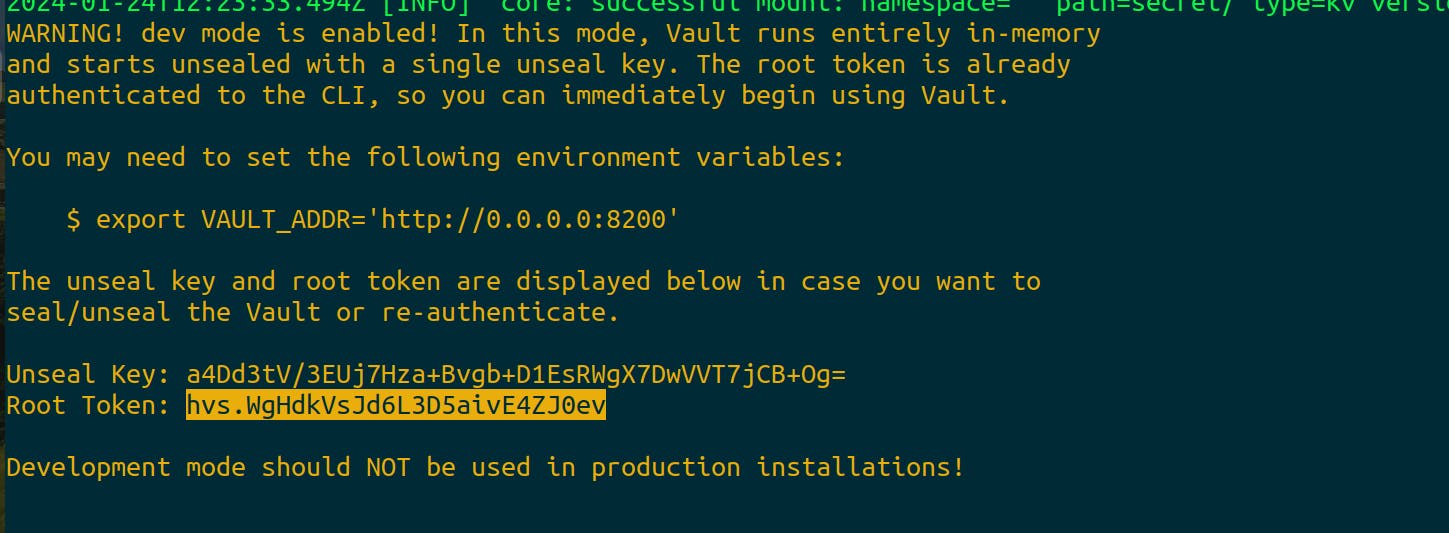
vault server -dev -dev-listen-address="0.0.0.0:8200"
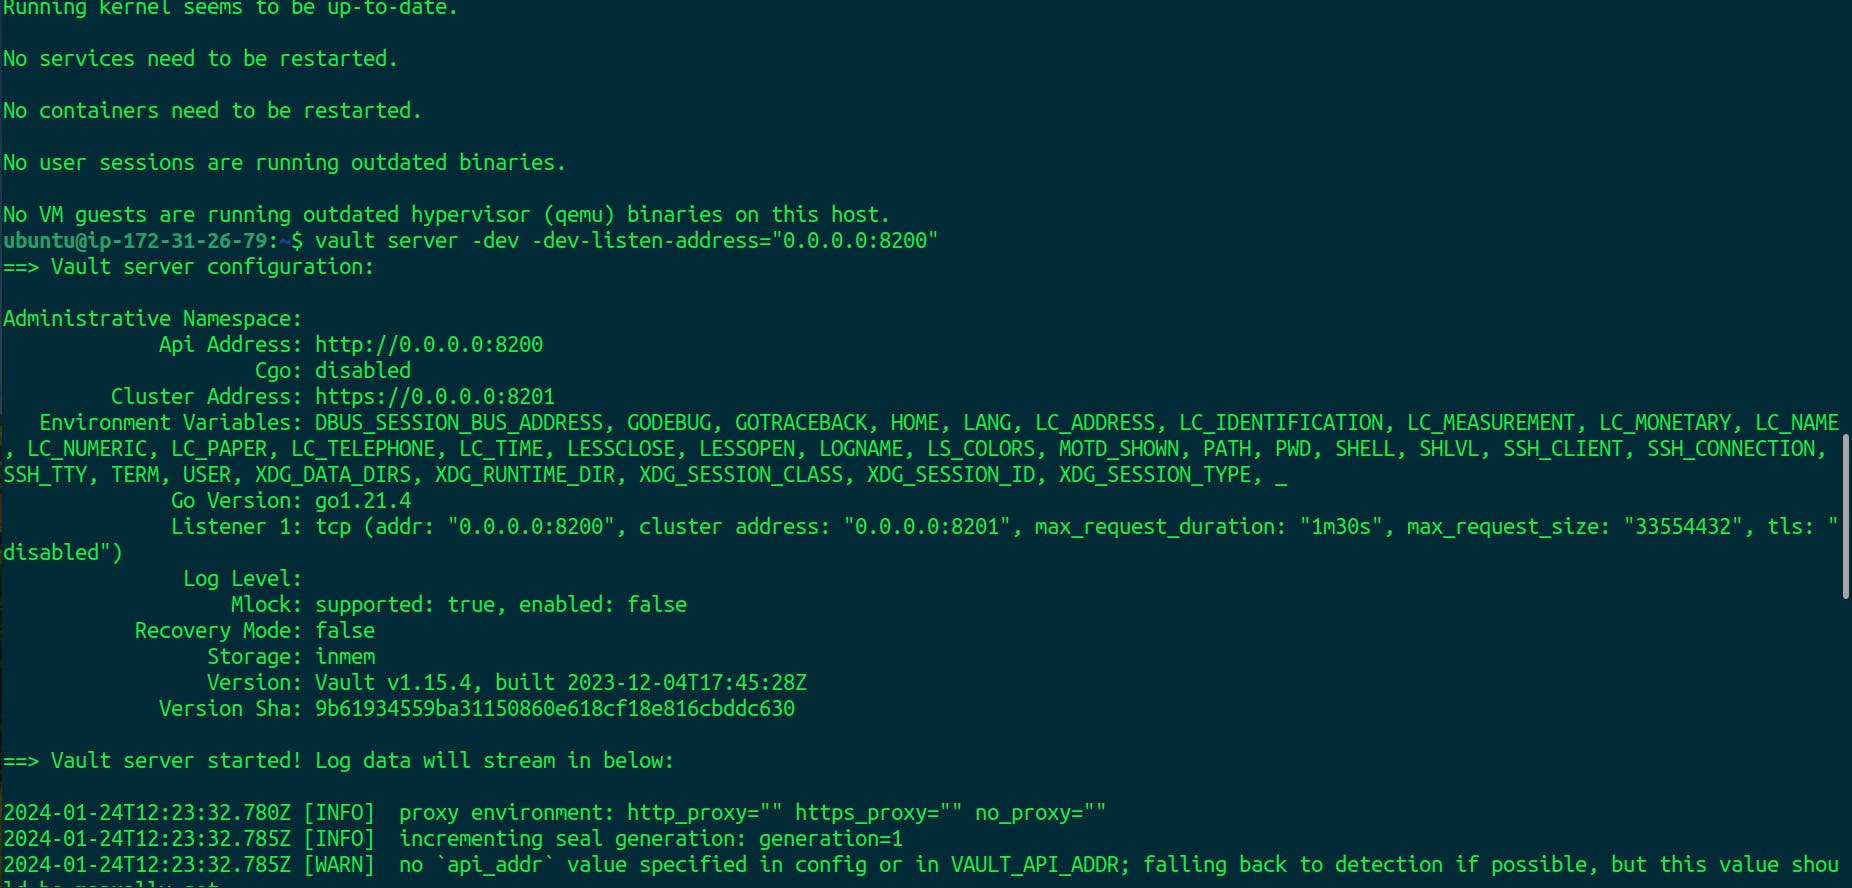
After executing all the commands above, our vault is running successfully.
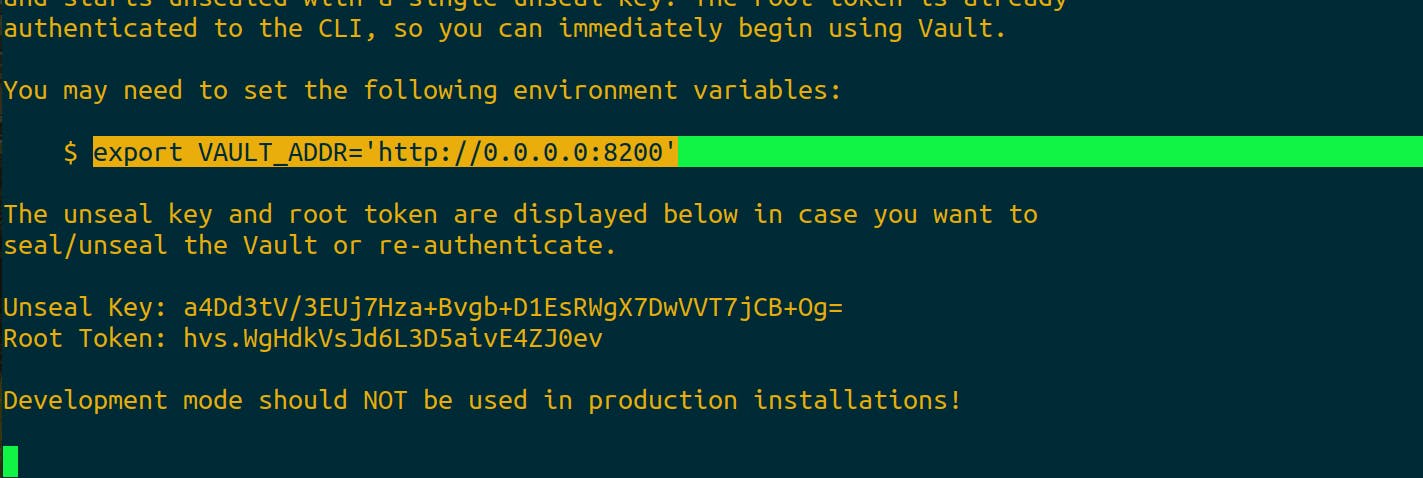
Open another terminal and log into the instance and run the following command that is displayed.
To access the vault we need to give the access to instance to access port 8200.

Lets access the Vault in http://3.88.160.206:8200/
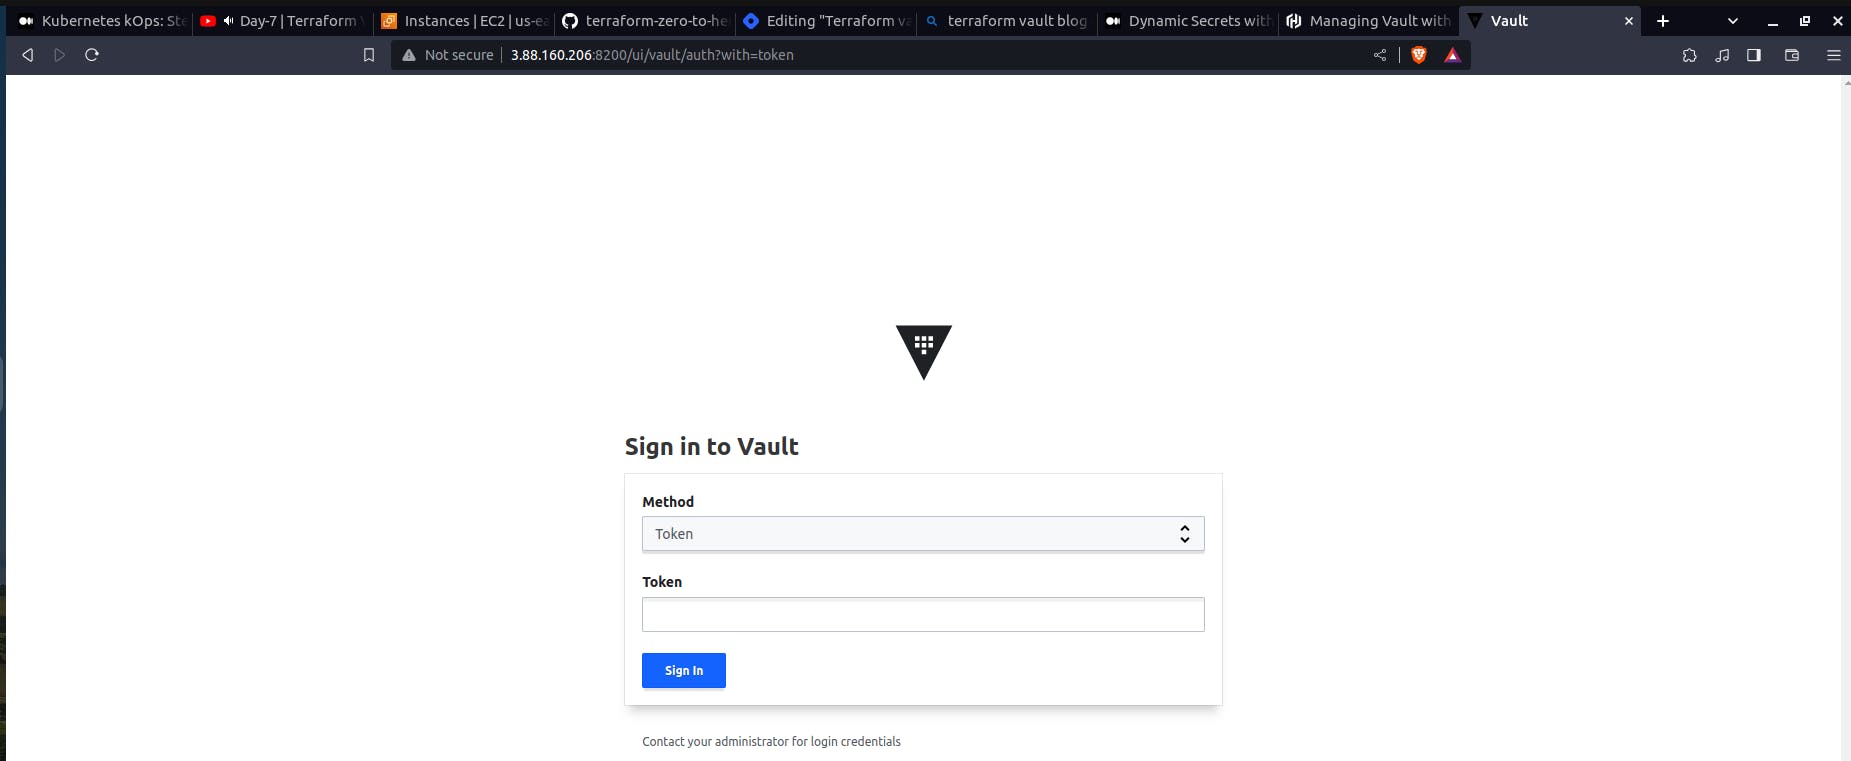
Now to log into the Vault, the token is available in the terminal. Copy the code and paste it.
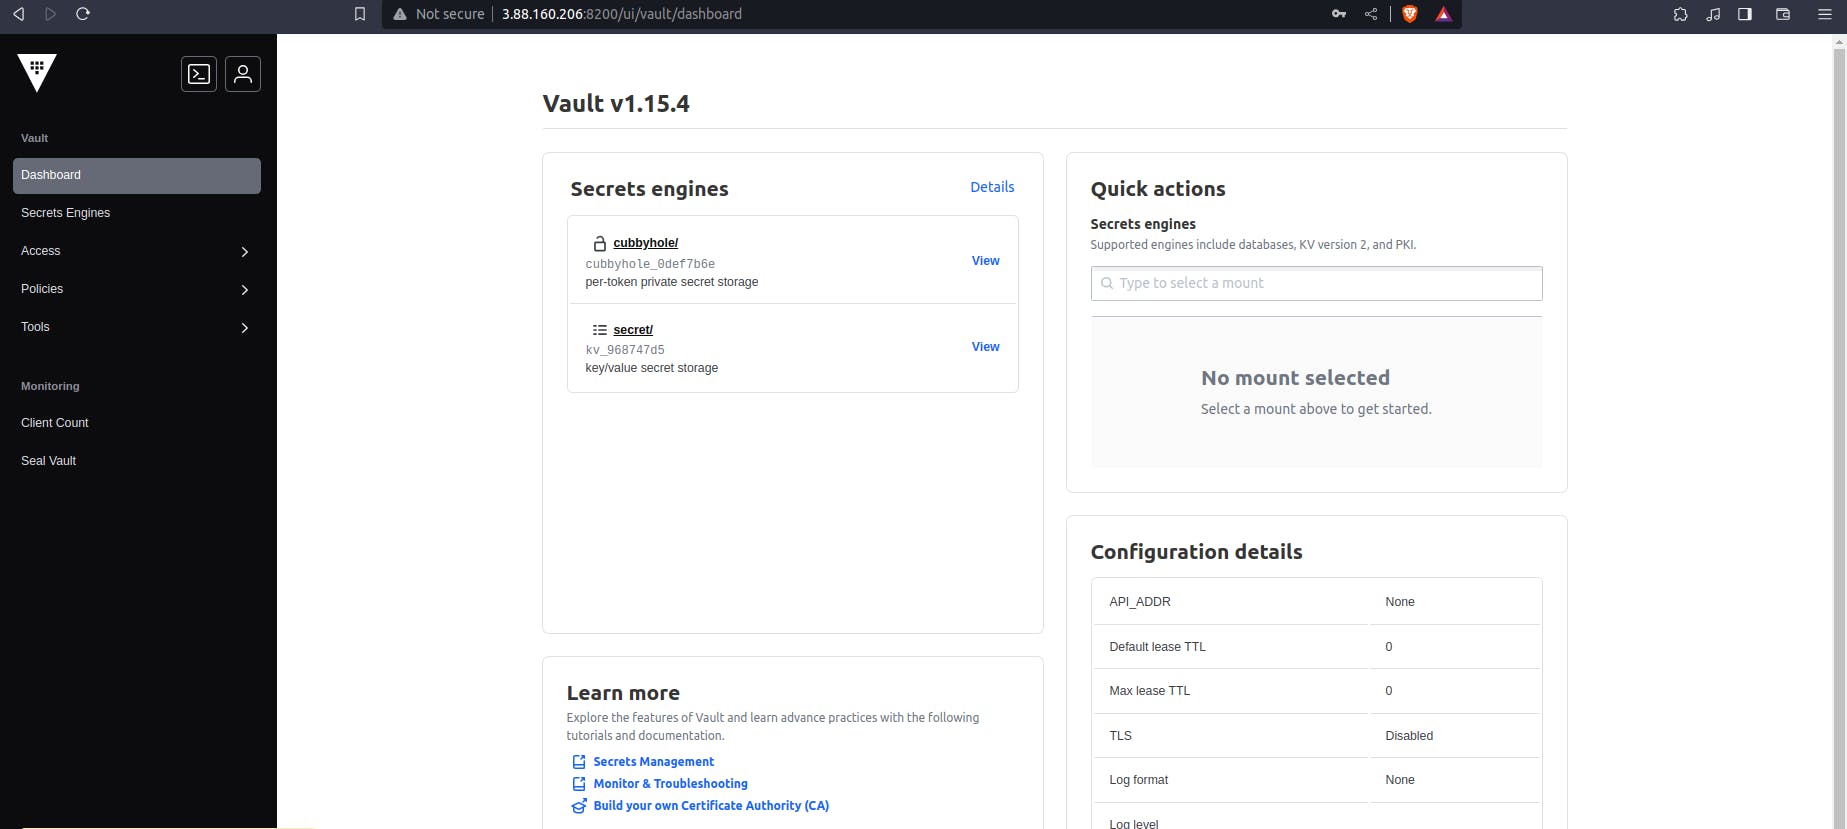
We have successfully logged into the Vault.
At the sidebar, we can see the Secret ENgines, Access, Policies. Let's know about these.
Secret Engine
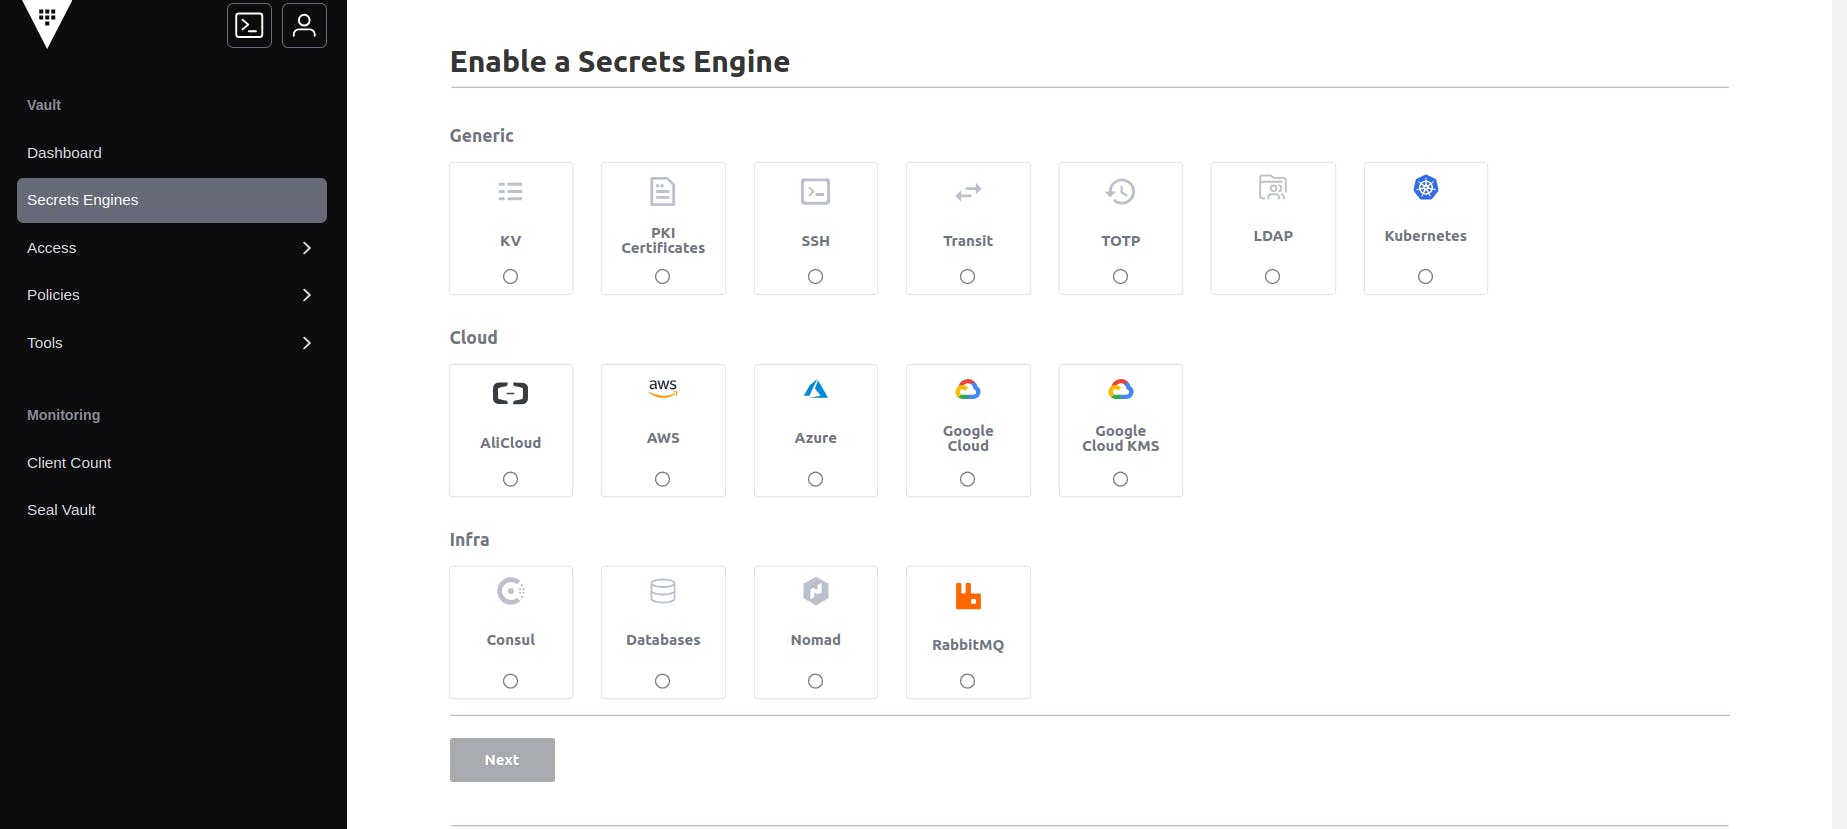
The Secret Engine in HashiCorp Vault is responsible for managing and dispensing secrets, which are sensitive pieces of information such as API keys, passwords, or certificates. They are nothing but the different types of secrets that we can create in Hashicorp Vault.
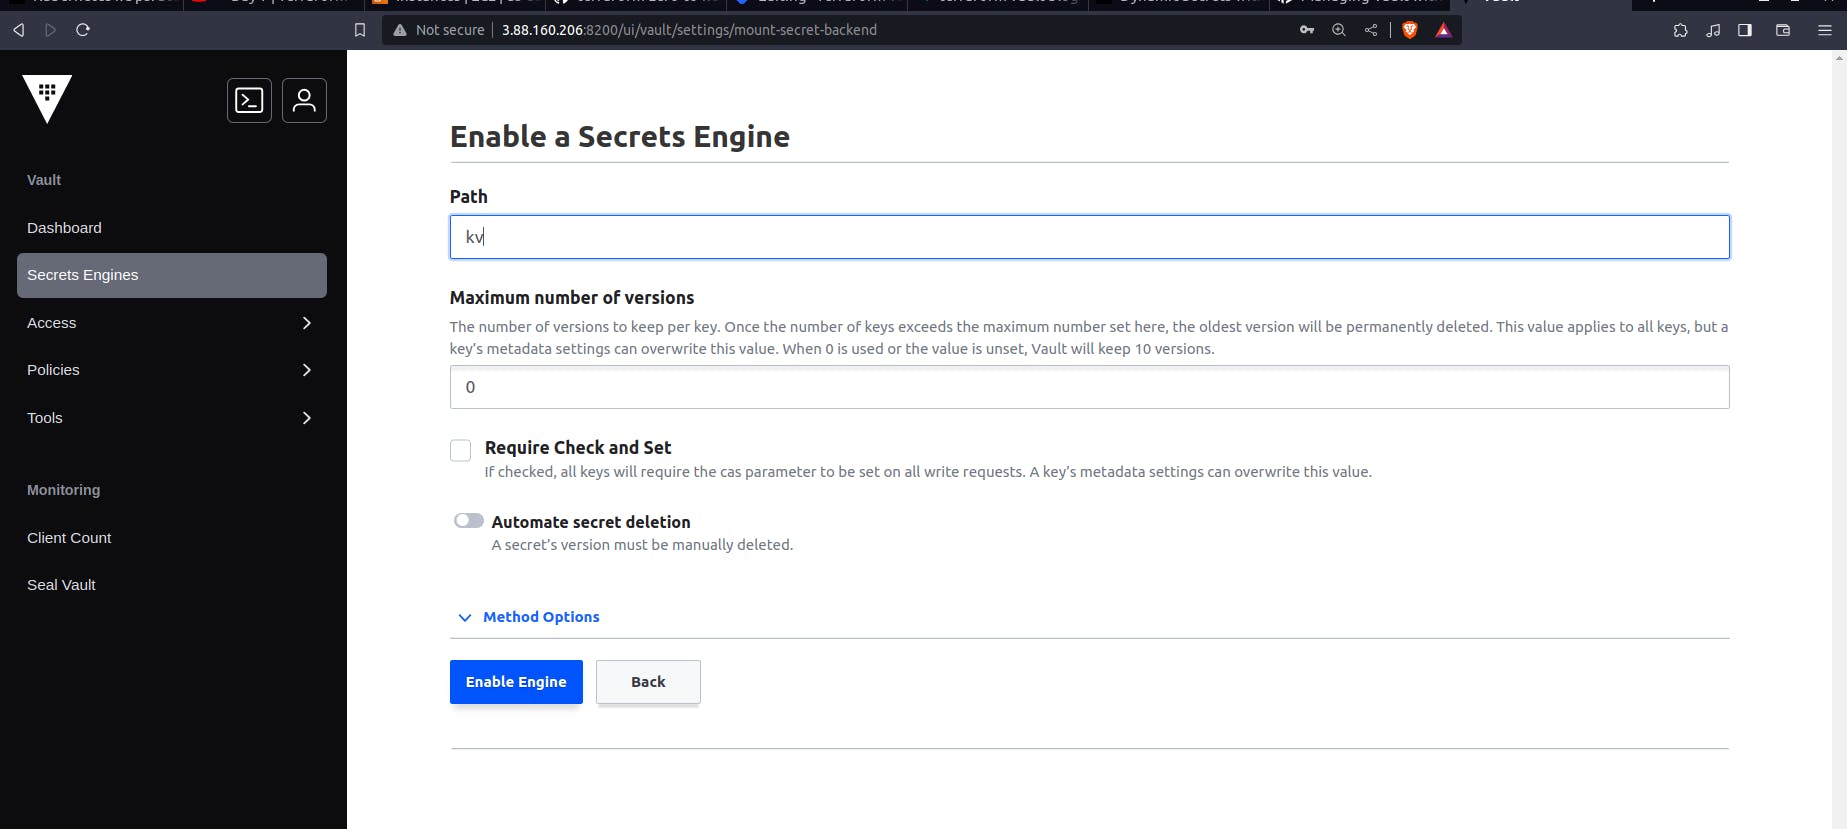
We create a simple engine and the engine is enabled. IT will be used to create the key-value pairs.
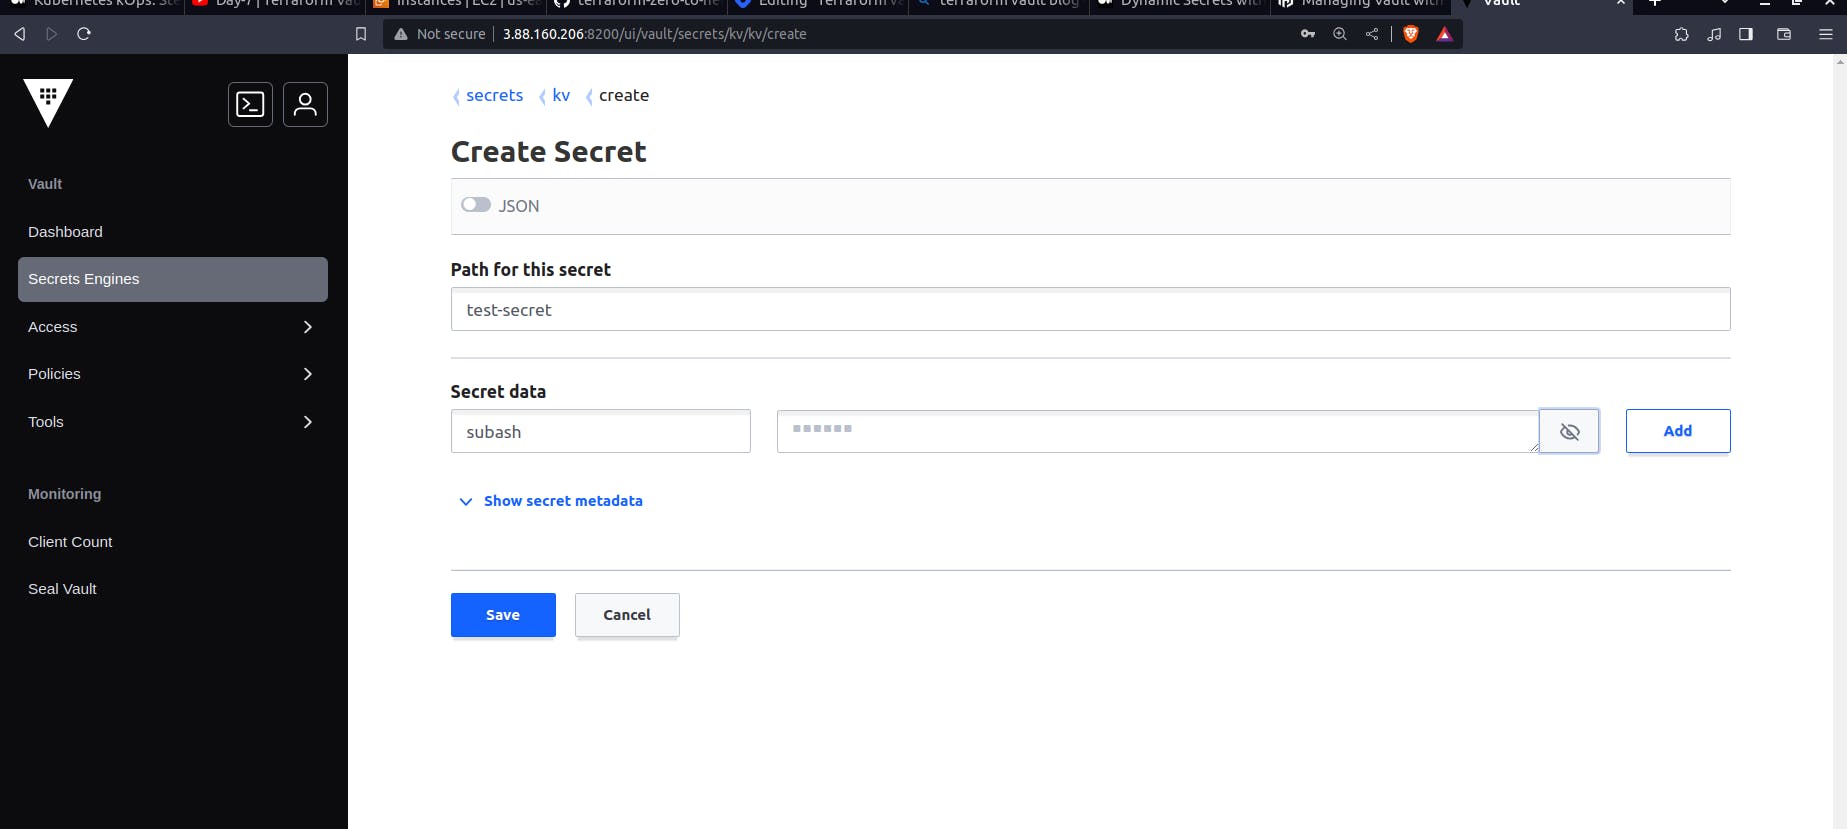
A secret is created inside the Hashicorp Vault. only the root user has access to it. If anyone wants to access the secret through Terraform or Ansible, they need the grant. The grant is only possible from the Access feature of Vault. Here in the Hashicorp vault, Access can be considered as an IAM role and Policy can be considered as IAM policy.
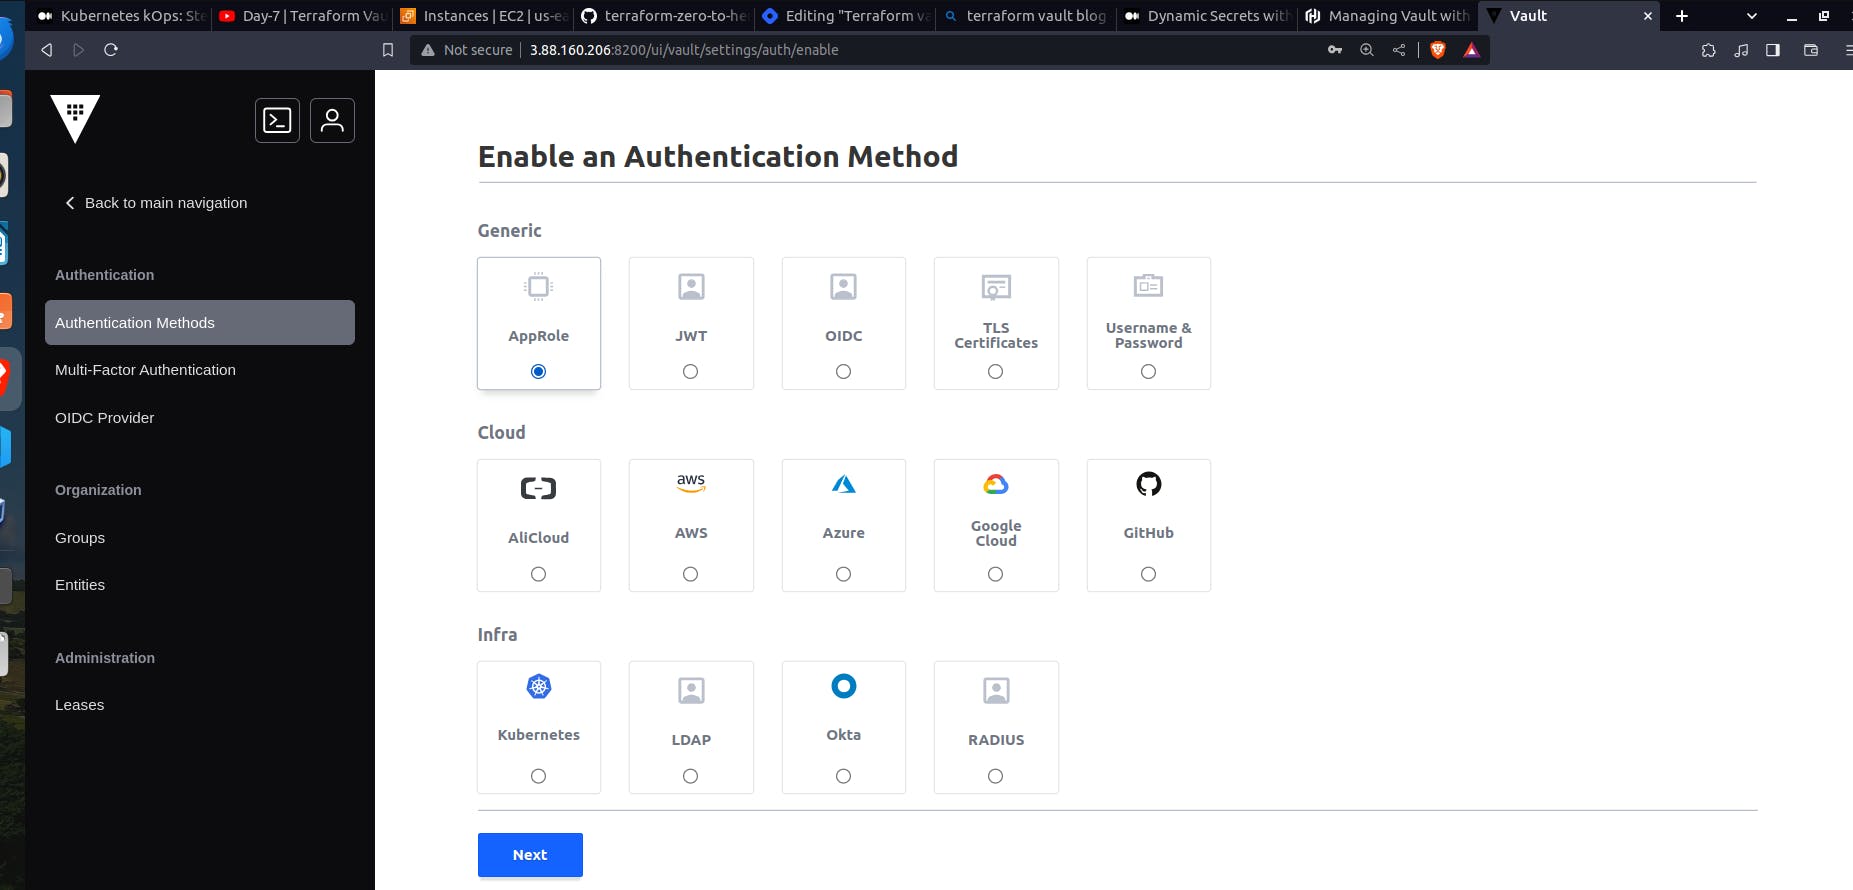
In the Access section, there are different authentication methods, we chose the AppRole. But we cannot create the role using UI, we need do it from the terminal.
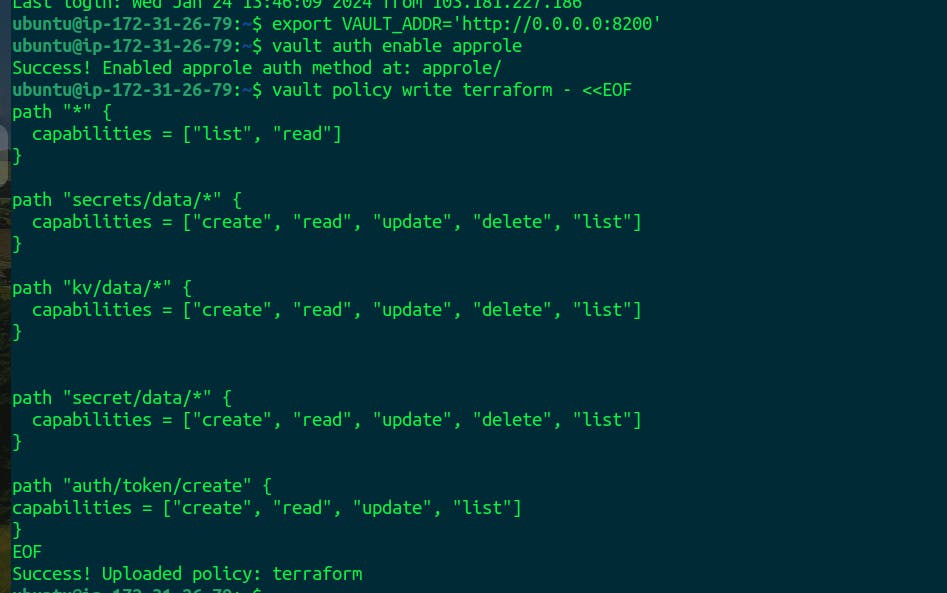
Enable the authentication method
vault auth enable approle
Let's create the policy
vault policy write terraform - <<EOF
path "*" {
  capabilities = ["list", "read"]
}

path "secrets/data/*" {
  capabilities = ["create", "read", "update", "delete", "list"]
}

path "kv/data/*" {
  capabilities = ["create", "read", "update", "delete", "list"]
}


path "secret/data/*" {
  capabilities = ["create", "read", "update", "delete", "list"]
}

path "auth/token/create" {
capabilities = ["create", "read", "update", "list"]
}
EOF
Create the Role
vault write auth/approle/role/terraform \
    secret_id_ttl=10m \
    token_num_uses=10 \
    token_ttl=20m \
    token_max_ttl=30m \
    secret_id_num_uses=40 \
    token_policies=terraform

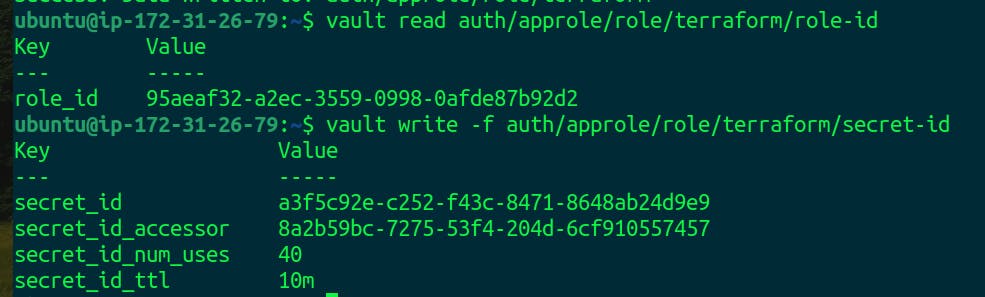
After creating the AppRole, you need to generate a Role ID and Secret ID pair. The Role ID is a static identifier, while the Secret ID is a dynamic credential.
Generate Role ID:
vault read auth/approle/role/terraform/role-id
Generate Secret ID:
vault write -f auth/approle/role/terraform/secret-id
We will create the instance and will use the secret created in the vault.
provider "aws" {
  region = "us-east-1"
}

provider "vault" {
  address = "3.88.160.206:8200"
  skip_child_token = true

  auth_login {
    path = "auth/approle/login"

    parameters = {
      role_id = "ed169c1c-c96b-613a-479a-c1b82de9a720"
      secret_id = "5a65c56e-3132-2410-b83a-bd52658dfcf2"
    }
  }
}

data "vault_kv_secret_v2" "example" {
  mount = "kv"
  name  = "test-secret"
}

resource "aws_instance" "my_instance" {
  ami           = "ami-053b0d53c279acc90"
  instance_type = "t2.micro"

  tags = {
    Name = "test"
    Secret = data.vault_kv_secret_v2.example.data["subash"]
  }
}
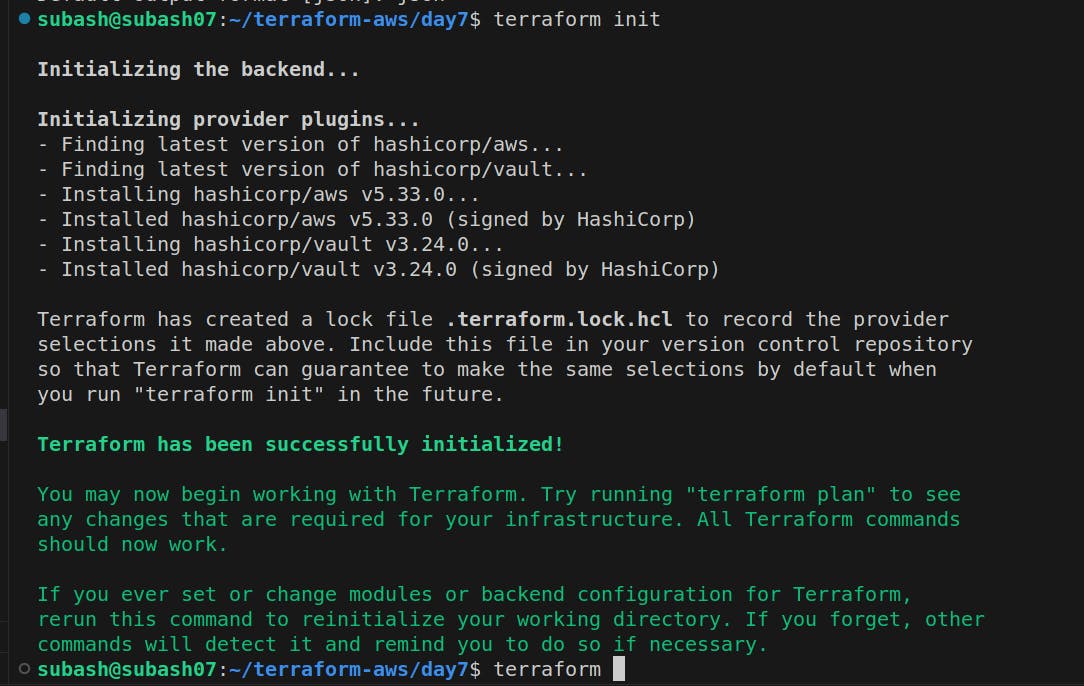
terraform plan
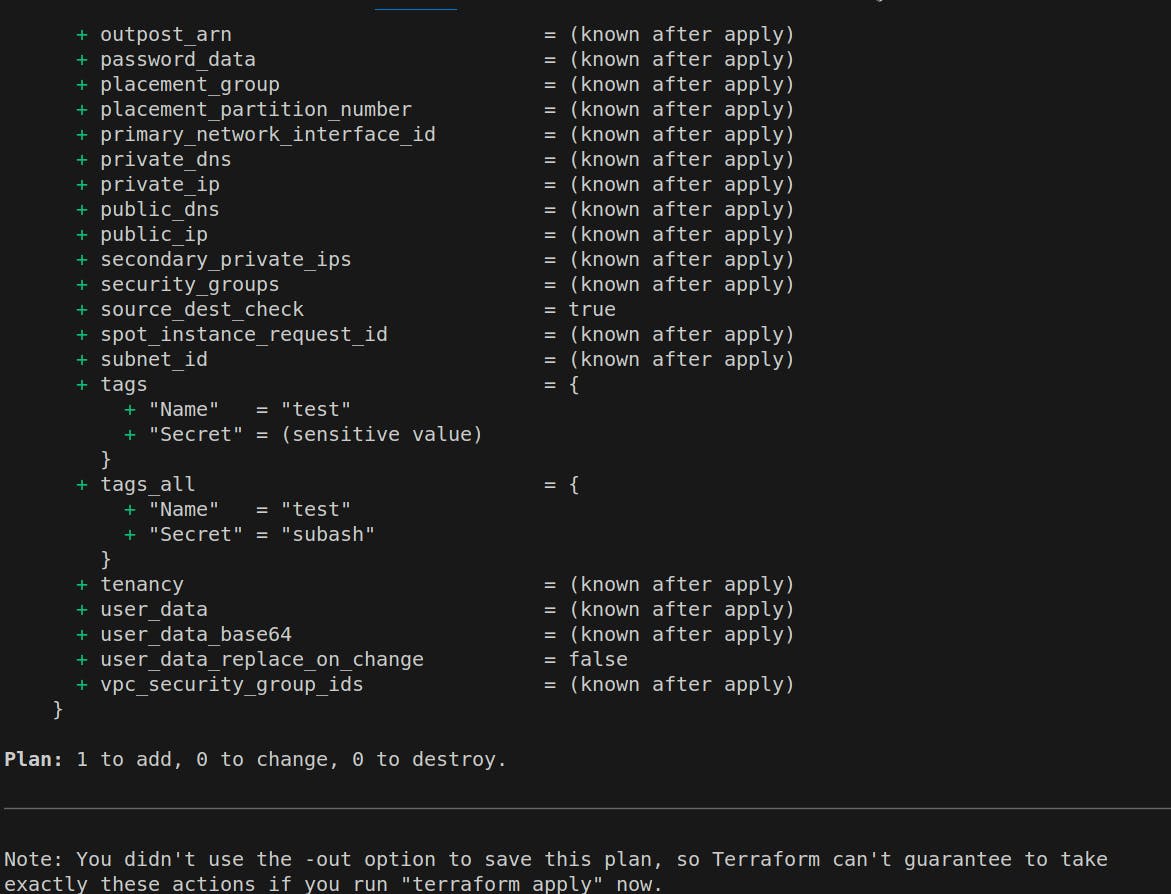
It shows the 1 to add and in the tag section name=" test" and secret="subash" will be imported from the hashicorp vault.
terraform apply
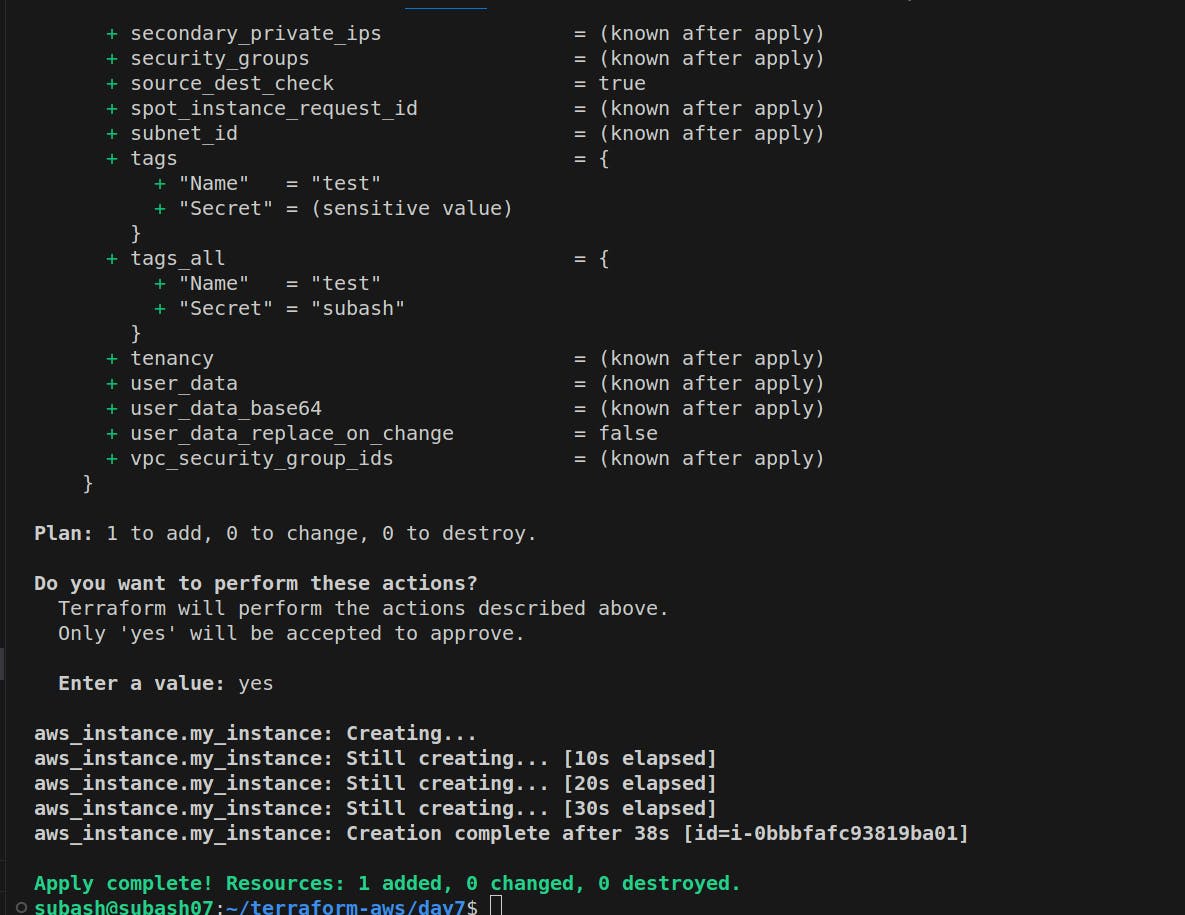
The Terraform apply is successful and the resource is added.
Our resource is created successfully.

We can see in the tag section the secret named "subash" is also imported from the Hashicorp vault that we had created earlier.
Destroy the resources
terraform destroy
This integration enhances the security of your infrastructure by centralizing and managing secrets in the HashiCorp Vault, allowing Terraform to securely access and use these secrets during infrastructure provisioning. It's a great practice for ensuring the integrity of sensitive data and minimizing the risk of unauthorized access or data leaks.
I hope you liked this blog. If any mistake, do comment down below 🚀.
Do like and share this blog♥️