


The Amazon Web Services (AWS) platform is one of the most well-known and adaptable in the world of cloud computing. AWS provides a wide range of services to meet different company needs, from hosting websites to conducting sophisticated data analytics. For anyone navigating the cloud environment, administering Amazon EC2 instances is one of the many services offered by AWS. In this article, we'll examine the crucial tool NMTUI and show you how to configure a static IP address, hostname, and DNS for your EC2 instances with it, streamlining and streamlining your AWS management responsibilities.
What is NMTUI?
The command-line utility known as NMTUI, or NetworkManager Text User Interface, makes it simple to configure network-related settings on Linux computers. This tool offers a simple user interface for controlling network connections, including customizing DNS settings, setting static IP addresses, and changing the hostname.
Requirements
Before we dive into using NMTUI to configure your AWS instance, make sure you have the following prerequisites in place:
AWS EC2 Instance: You should have a running EC2 instance on AWS. If you haven't created one yet, AWS provides a user-friendly interface to launch instances.
SSH Access: Ensure that you have SSH access to your EC2 instance. You'll need this to connect to the instance and use NMTUI.
Setting Up a Static IP Address
To set a static IP address for your EC2 instance using NMTUI, follow these steps:
SSH into your EC2 instance:
ssh -i your-key.pem ec2-user@your-instance-ipInstall NMTUI:
NMTUI may not be installed by default on your instance. To install it, use the package manager for your Linux distribution. For example, on Amazon Linux 2:
sudo apt install NetworkManager-tuiOpen NMTUI:
Run the following command to start NMTUI:
sudo nmtui
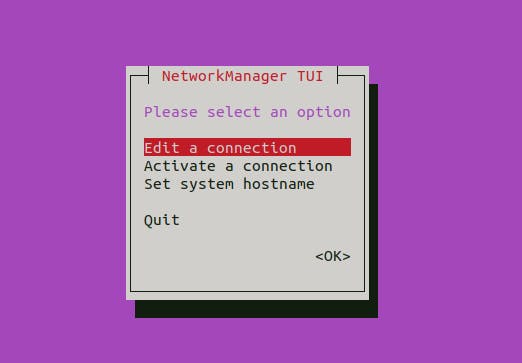
Now on running sudo nmtui, we will get the following interface;
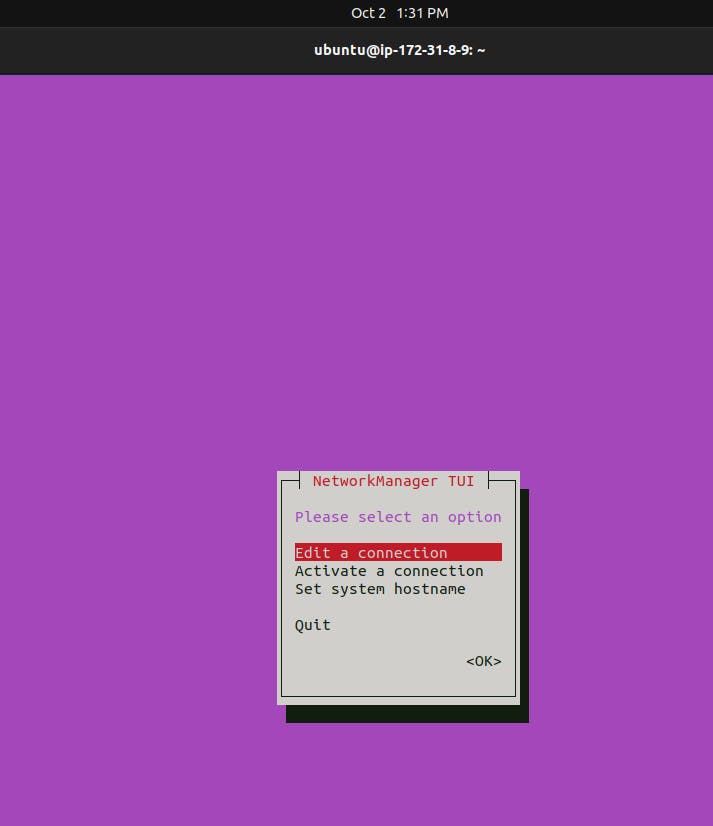
Let's change the hostname
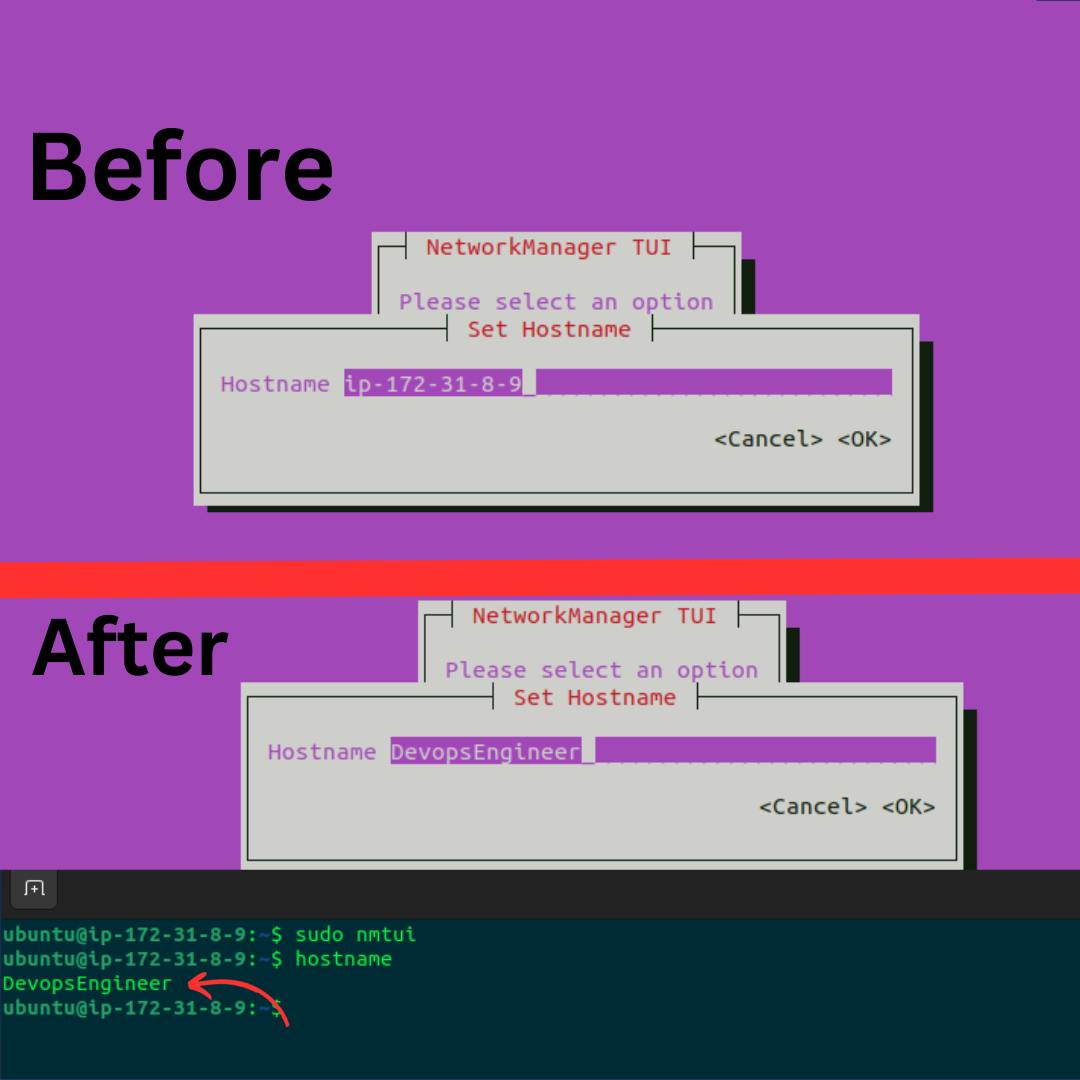
Hurray!! We have changed our machine's hostname.
Now let us set the IP address and DNS server.
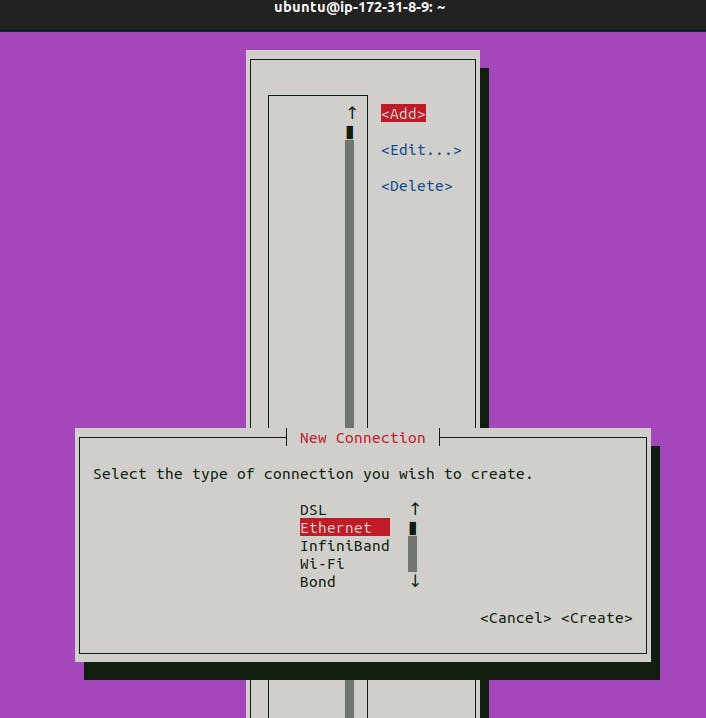
On running sudo nmtui command we will get the following interface, then click on "Edit a connection" and hit Enter.
After that click on ADD to create a new connection and then choose ethernet and hit Enter.
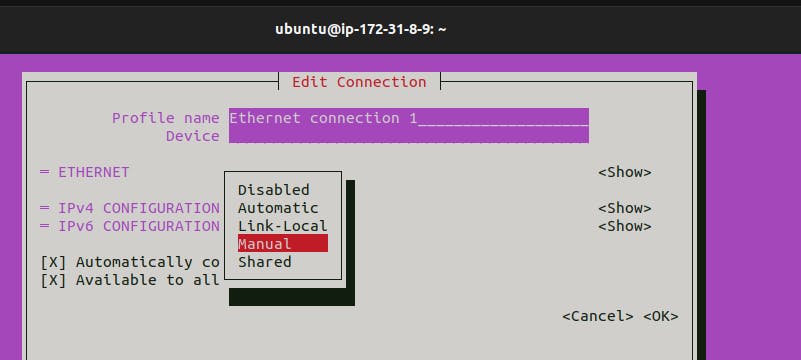
Once we hit Enter, we need to choose IPV4 configuration and here we need to change the automatic to manual option to set the IP address. Click on Show to edit the details.
We need to add the details as per our requirements.
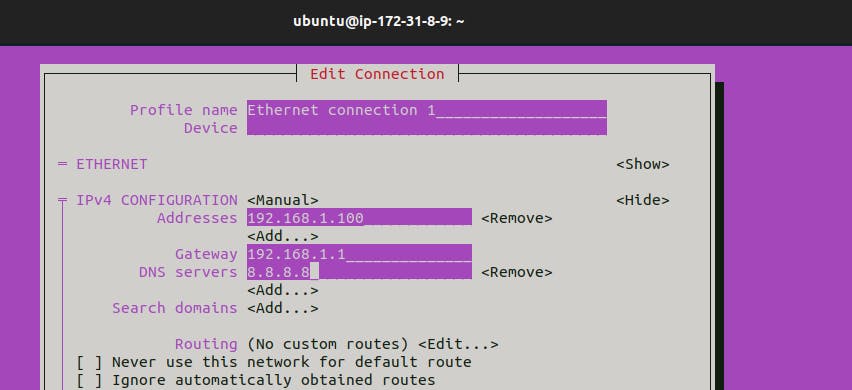
Save the details and activate the connection.
To verify the changes you have made to the network configuration, you can use various commands and tools
ip addr #verify IP address
cat /etc/resolv.conf #verify DNS
hostname #check hostname
NMTUI is a useful tool for streamlining AWS EC2 instance network configuration procedures. With it, you can quickly setup hostnames, set static IP addresses, and modify DNS settings to customize your instances to meet your unique requirements. Understanding NMTUI will help you manage AWS resources more effectively and efficiently, which will save you time and simplify cloud instance management.
Happy Learning!!