


Containerizing Joy: Building and Dockerizing Your Python Hello World Web App


In this blog, we will discuss building a simple web app dockerized it, and running it into the container with the practical demo. By the end of this guide, you'll not only have a Dockerized web app but also a grin of accomplishment.
Why Docker?
Docker provides a standardized environment, ensuring your app runs consistently across different machines. It encapsulates your application and its dependencies into a container, making deployment a breeze. Plus, it plays well with Hello World projects—simple yet profound.
Prerequisite
- Docker
But before building the dockerized web app, let's try to build the non-dockerized web app so that we can see the cons of it and it will help us to know the benefits of building the dockerized applications from now.
Let's write the code in app.py file:
from flask import Flask

app = Flask(__name__)

@app.route("/")

def hello():
    return "Hello World from DevOps Learner"

if __name__ == "__main__":
    app.run(host="0.0.0.0", port=5000)
My above code defines a basic Flask web app with a single route ("/") that returns the message "Hello World from DevOps Learner." The if __name__ == "__main__": block ensures the app runs only when the script is executed directly, starting the Flask development server on http://0.0.0.0:5000 .
We need to install the flask in the machine if it is not already present, since Flask is required to run this web app.

We have successfully installed the flask in our system. Now lets run the app
python3 app.py
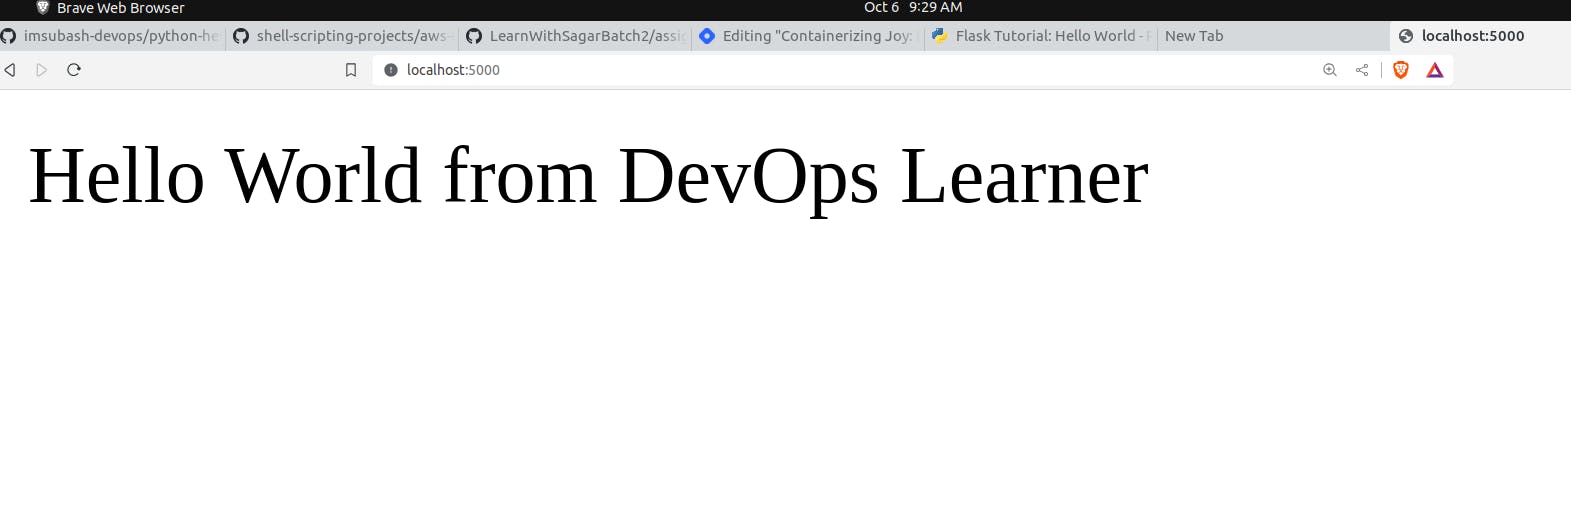
Hurray 🥳🥳, we have successfully launched our web app.
Before executing this straightforward Hello World web app, we had to set up several dependencies on our system, such as Python3, the pip module, and Flask. Surprisingly, even for a basic Python application, we found ourselves installing various prerequisites. The hassle didn't stop there; when working with code in other languages, the cycle repeated—we had to install their specific dependencies. This routine became cumbersome, demanding programmers to install different dependencies every time they ran an application.
In response to this challenge, we transitioned to Dockerization. Here, we encapsulate our code along with its dependencies in a Dockerfile. By building an image from this file, we create a portable environment that can be effortlessly launched in any setting. This approach eliminates the need for repetitive manual installations, providing a streamlined solution for developers.
Dockerizing the Magic
Dockerfile:
Create a file named Dockerfile (no file extension) in your project directory. This file contains instructions for building a Docker image. Add the following:
FROM python:3.8-slim

COPY app.py .

RUN python3 -m pip install flask

CMD ["python3","app.py"]
Here this Dockerfile uses the Python 3.8-slim base image, copies the "app.py" file into the container, installs Flask using pip, and sets the command to run "app.py" upon container start.
Build the docker image
docker build -t hellopython . #"." for current directory
-t: tagging the image with the name "hellopython". You can replace "hellopython" with any other name that you find suitable for your image.

The docker image is built successfully. Let's verify it using the command:
docker images | grep "hellopython"

Now, run your Dockerized app:
syntax: docker run -itd --name container_name -p host_port:container_port docker_image_name
docker run -itd --name devops-hello -p 5000:5000 hellopython
Verify:


Here, we observe the creation of two containers: one named "devops-hello," running on the host port 5000, and another labeled "devops-hello-world," operating on the host port 5080. Remarkably, this flexibility extends beyond just two instances—we can generate multiple containers using the same Docker image. The only adjustments required are specifying a distinct container name and assigning a unique host port for each instance. This versatility allows for the seamless scaling of containers while maintaining a straightforward and consistent process.
Push Docker Image to DockerHUb
In order to push the docker image into the docker hub, run the following commands in the terminal.
Docker login
docker loginTag Your Docker Image
docker tag docker_image username/repository-namePush the Docker Image
docker push username/repo-name
Let's see whether our image is pushed into the docker hub or not.

Hurray 🥳🥳, we have successfully pushed our image into the docker hub.
In this manner, Dockerization provides a universal solution for packaging and deploying applications across diverse environments. By encapsulating both the application and its dependencies in a Docker image, we gain the flexibility to seamlessly utilize them wherever needed. Furthermore, the convenience of pushing and pulling these images from Docker Hub ensures effortless sharing and deployment. This streamlined process not only enhances portability but also simplifies the management of applications, making Docker a powerful tool for developers across various scenarios.
Happy Learning!!